Spacetorio
A space factory game experiment in pure C++ and OpenGL.
2023-01-22
Not all the project need to be completed in order to learn from those. This is a perfect example of this.
For this game, I didn't go too far, but I learned so much from it that it make it just as valuable as everything else. For this game I wanted to go deep in the "build it from scratch" vibes, so I opted in for C++ with SDL as the main "framework", and pure OpenGL for all the graphics. I used low level graphic APIs before, but not as in dept like this time, so it was very interesting to understand deeply all the bits that make stuff magically appear on the screen.
But I didn't just learn OpenGL stuff from this, I also really enjoyed working on all the following problems and it was a great experience for each on of those.
Game Design
First, let's talk about what I was trying to create, so you can also better understand why I approached all those problems.
I love resource management games, I love space exploration, and I love Factorio. So I wanted to create something that took a bit of everything from all of these. So I started to sketch out a design about a Terraria-like gameplay style, but the aim was more about automation and building instead of enemy fighting and exploration.
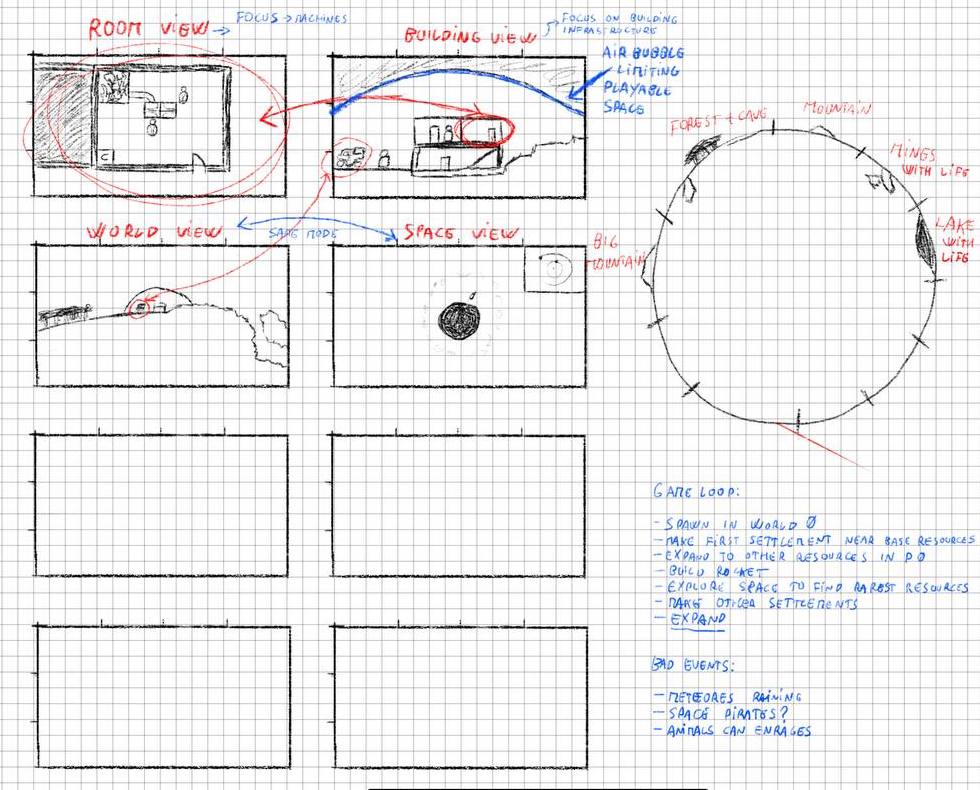
A small bonus I wanted to add (but I didn't manage to work at it since it was a later stage task) was the ability to switch between a "biome view" (the one like Terraria) and the "room view" (a top-down view about a single building room). This because I felt that I couldn't really achieve the Factorio-like complexity with a side view alone, so I wanted to also fine tune more the rooms with this "kinda 3D-ish" switch thing.
Also, I didn't want to limit the player to a single world, so I added the ability of leaving the current planet and seamlessly move around in space looking between other procedurally generated planets with different features and resources to extract. This was the first step to implement because I started with some kind of structure in order to have something like :
Main -> GameController -> Universe -> StarSystem -> Planet -> Biome

World Generation algorithm
After having a design somewhat clear of the goal I want to have, and after creating the first rough planet, I wanted to start with the actual world generation. Since I want a Terraria-like environment, and since one of the main goal is extract resources and building stuff, I (almost) had to work with tiles based map. And I like it, because it works really well with procedural generation since you can easily work your way through the main part of the algorithm thinking about black and white pixels of a PNG, and then port that map to actual tiles instances.
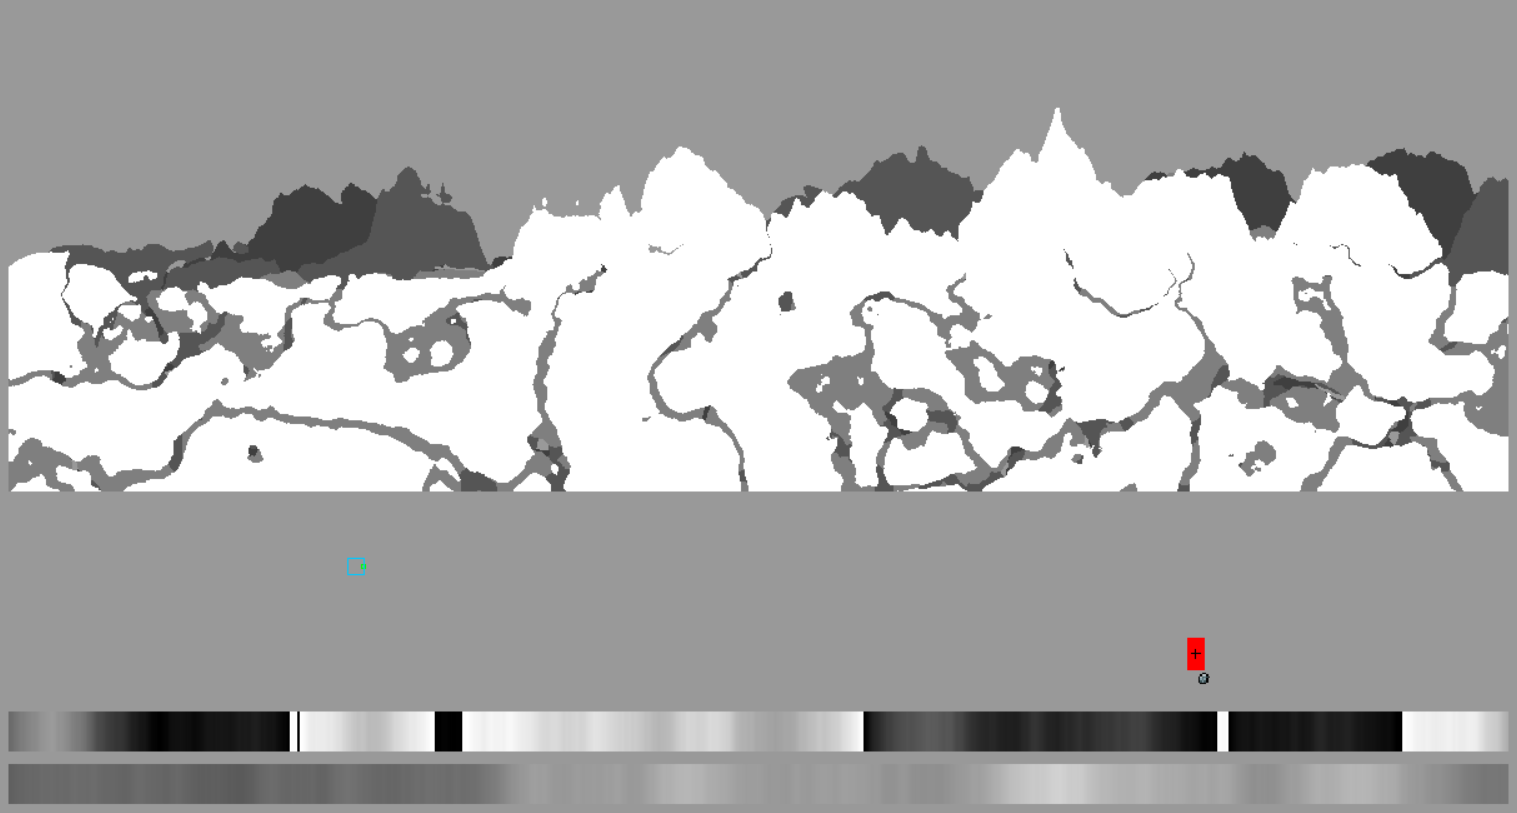
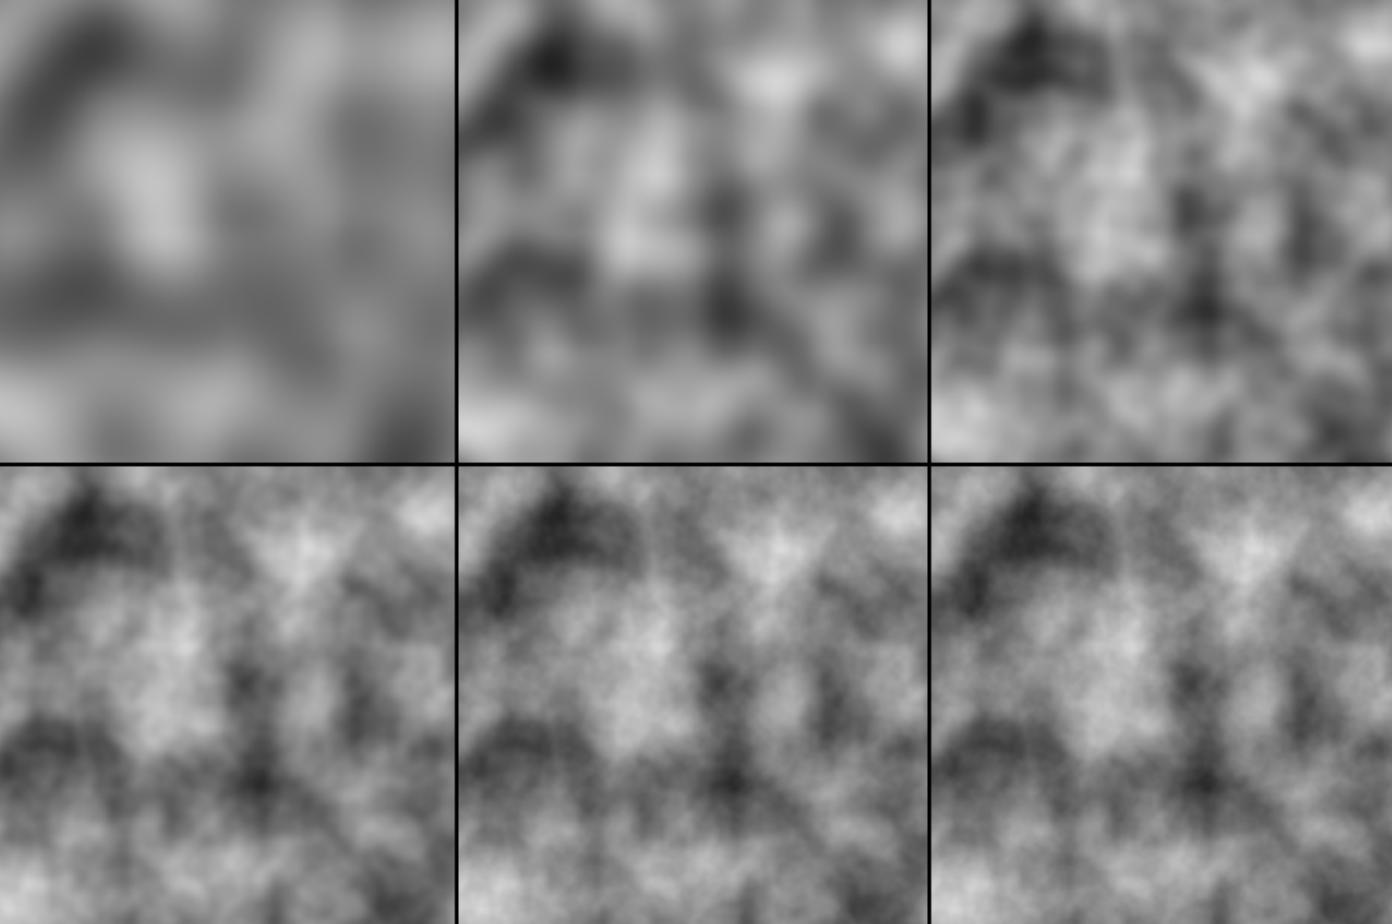
After reading a lot of articles about procedural generation, I stumbled upon a video of a conference talk with a lead Minecraft developer that explain deeply about the reasoning behind their world generation algorithm. It was very interesting and inspiring because they used Perlin noise as usual as the random generator, and then they used curves as their "selector" and modifier in order to warp that pure noise and make it behave more like an actual mountain/river/beach/etc. This was amazing also because that meant that once everything is set up, if I ever wanted to add a new biome type with different terrain features I could just change these curve points and model it to make it work.
Other than terrain, I also wanted to create caves in it, and that followed more or less the same logic, but the noise was first passed through an absolute value filter to make sharp edges inside the noise and use those to carve out caves like shapes on the ground. Then mixed those value with a simple vertical gradient in order to make it blend to the terrain and make the caves appear only underground and not everywhere.
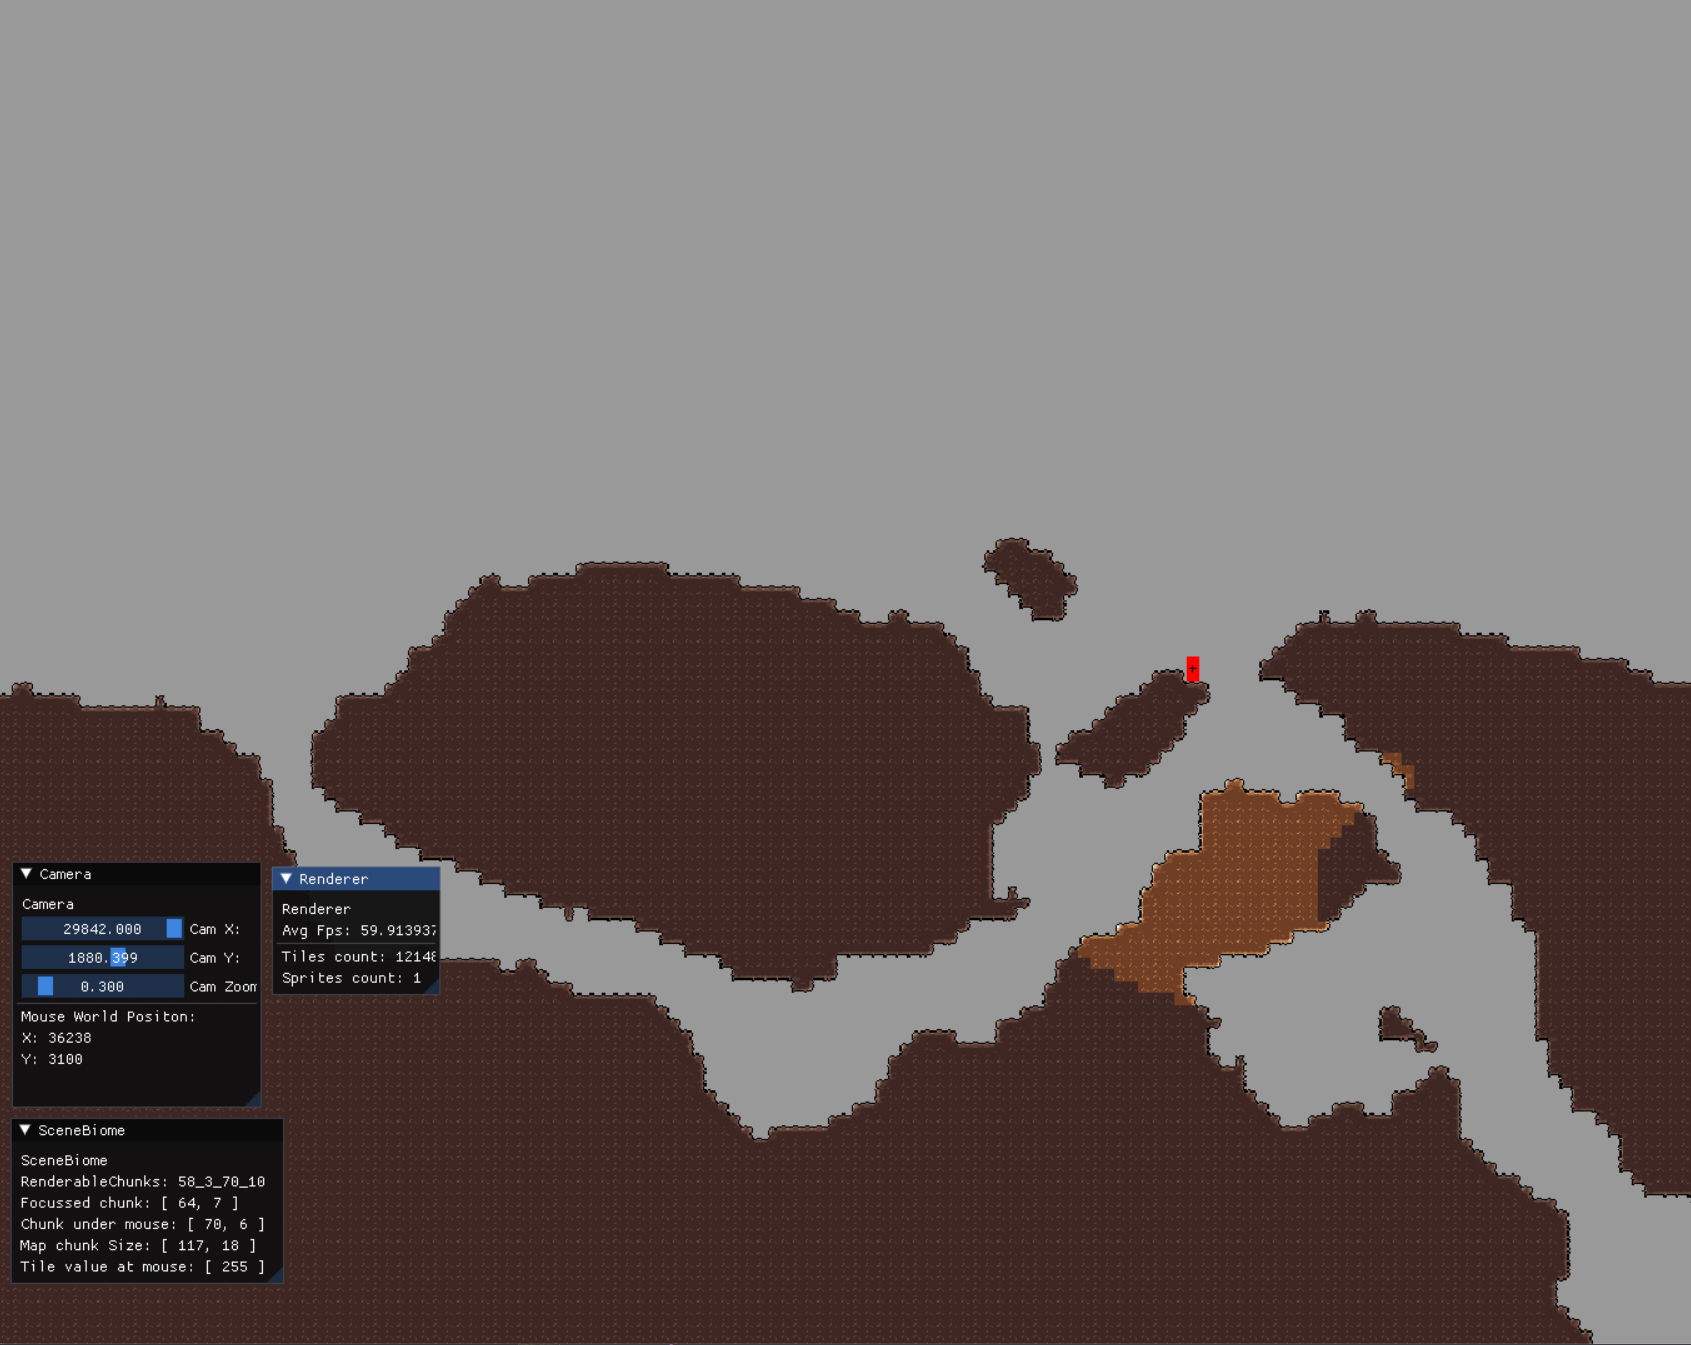
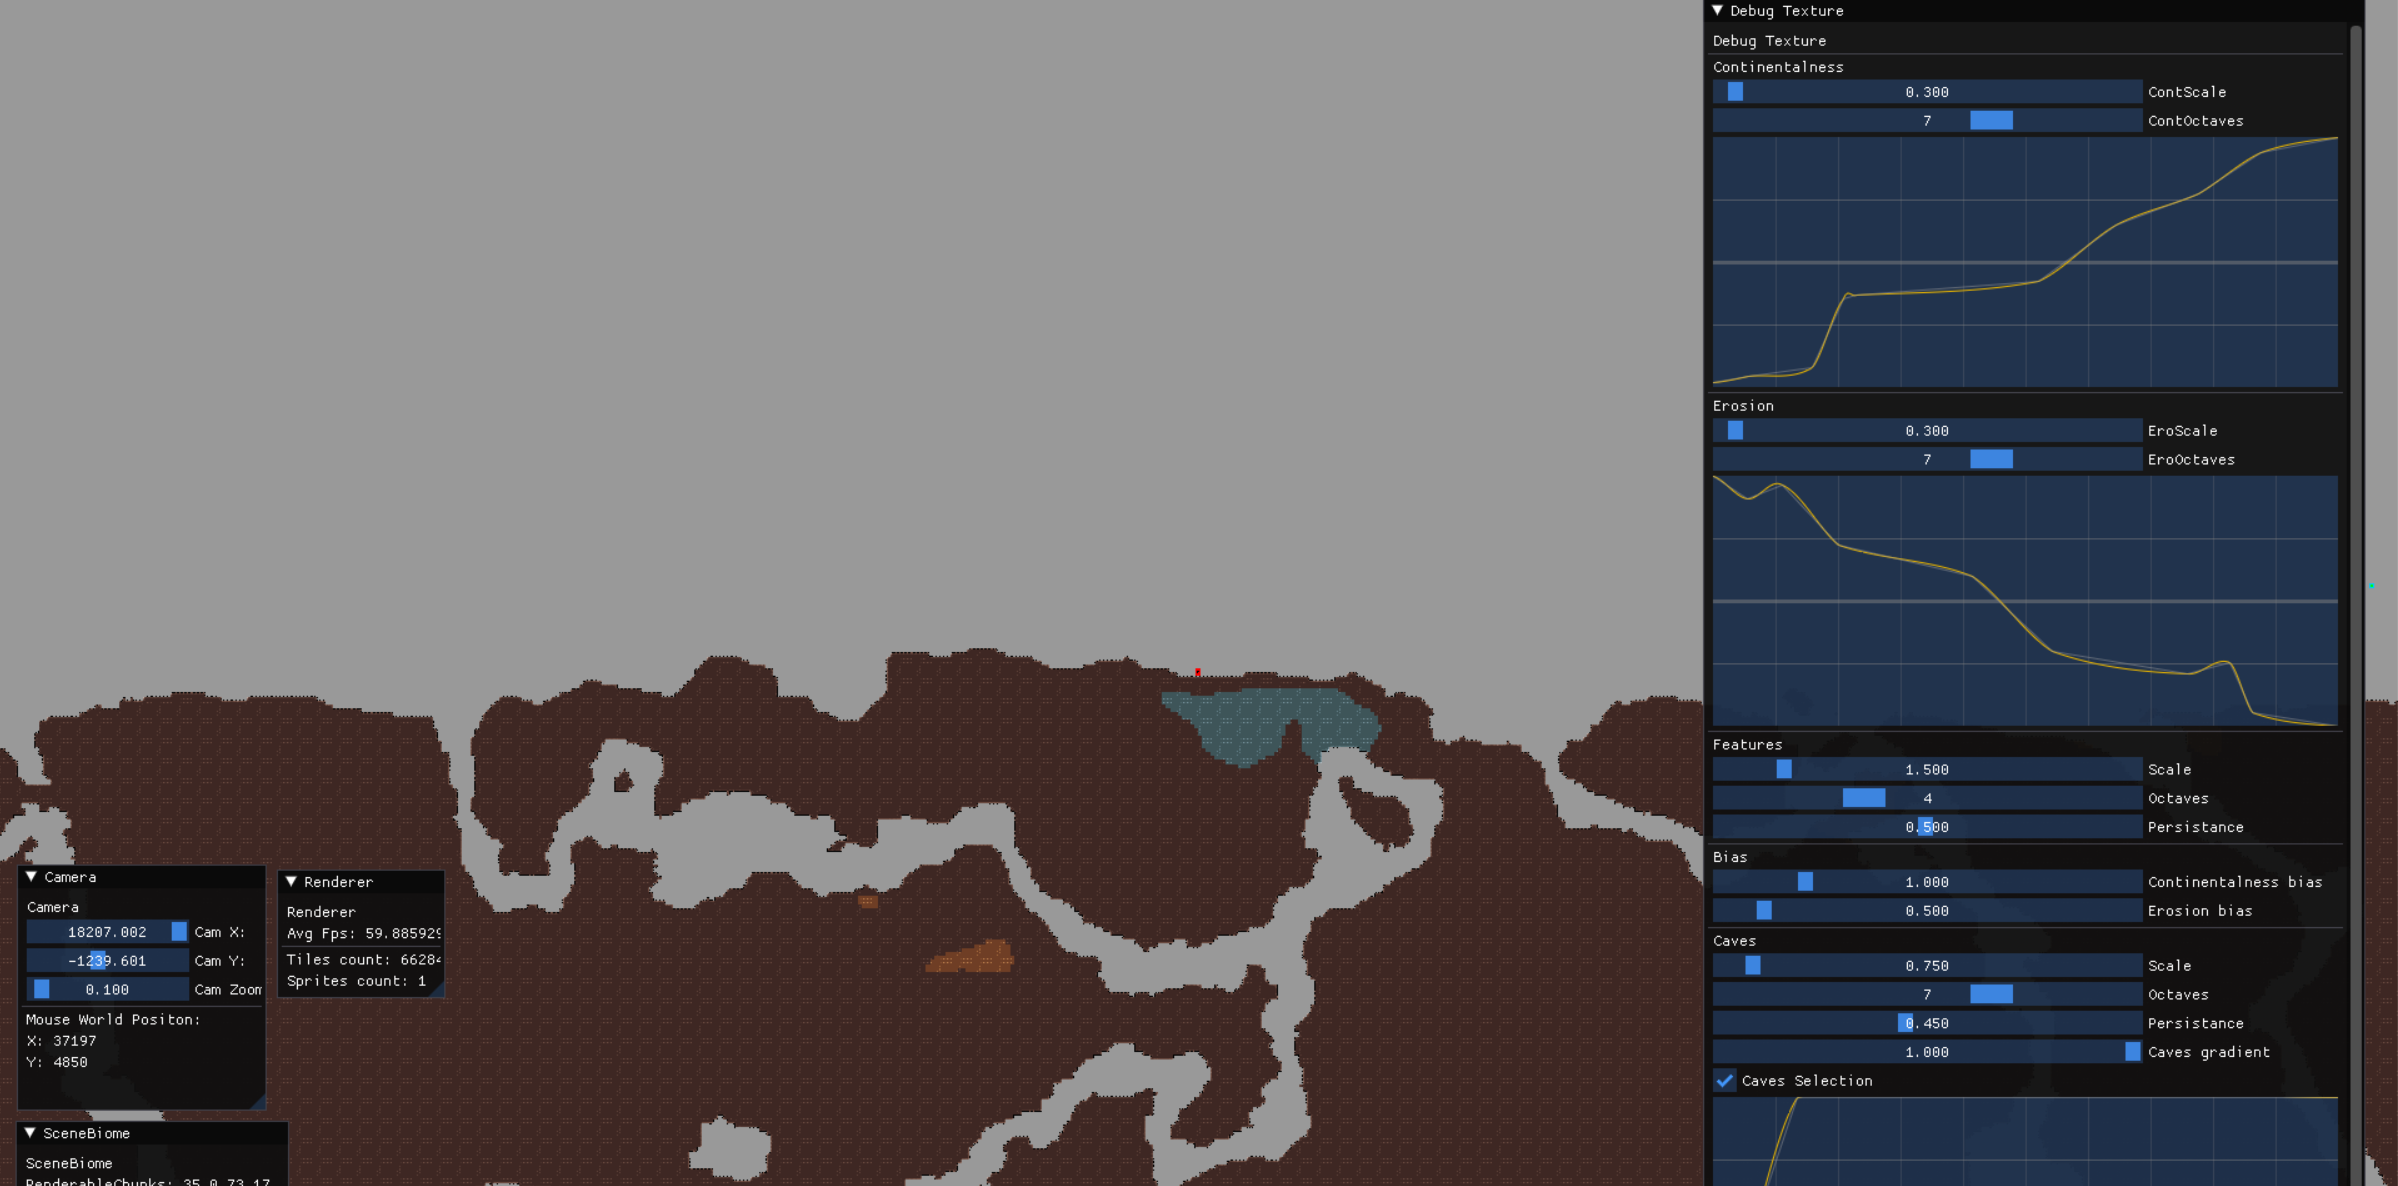
This is an example of the debug visualization of the (almost) real-time terrain generation.
Image Bending
From the design and the world generation above, it comes a new interesting technical challenge. I wanted to let the player see the planet as it is when he explores all the other planets as he moves around. This lead to an observation: Planets are shown as a 2D Circle, but the world generation is a 2D Rectangle. I still wanted the world to be flat for technical purpose while the player is actually on the planet, but I still wanted to render it detailed from the distance while in space as a circle to let he glance all the planet features somewhat accurately.
This means that I need a way to bend the bitmap I use as a base for the biome generation in order to be rendered as a circle slice. I probably could have used some module/library/algorithm available somewhere on the internet, I'm surely not the first one to have this kind of problem to solve. But I like to reinvent the wheel when I feel that the problem is interesting enough to really let me understand it, so I started to sketch out how I could achieve a naive algorithm on my iPad.
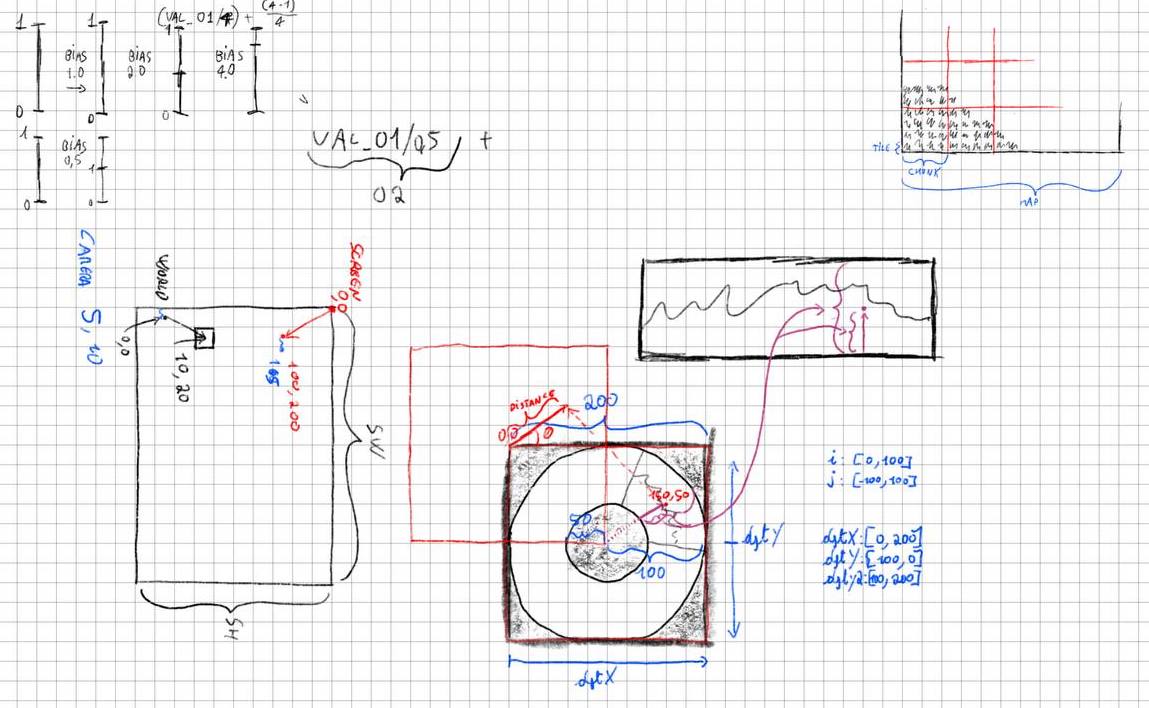
This algorithm needs quite a bit of math to work, but at the end if you approach it graphically is not so bad.
The highlight of it are:
-
First; bitmaps are not curved by nature. So if we want an image as the end result, we have to add a lot of empty pixels as padding to accommodate our image. To later be easily rotated and used to form the whole planets, I decided to make all the slices of the planet be inside an image big as the final planet. This is not really optimal memory wise, but it makes the code that uses this images much simpler, so I didn't want to over-complicate for now and sounds like a nice trade-off (all the extra pixels are all empty pixels anyway).
-
As input of our function we need to specify how we want the final image to be, and for that we need:
-
angle : to know how much of the circle we want to fill with our input image.
-
Inner Radius : We don't want to map all the way to the planet core, so this defines where the radius between the planet core and the last pixels of the input image.
-
Outer Radius : This is actually how big is our planet, so this defines where the top part of our image ends up from the core.
-
-
With the inputs defined, we start to iterate through all the output portion of our final image and proportionally map it back to the input image to retrieve the pixel information of that spot to fill our output image. This is the math heavy portion of the algorithm.
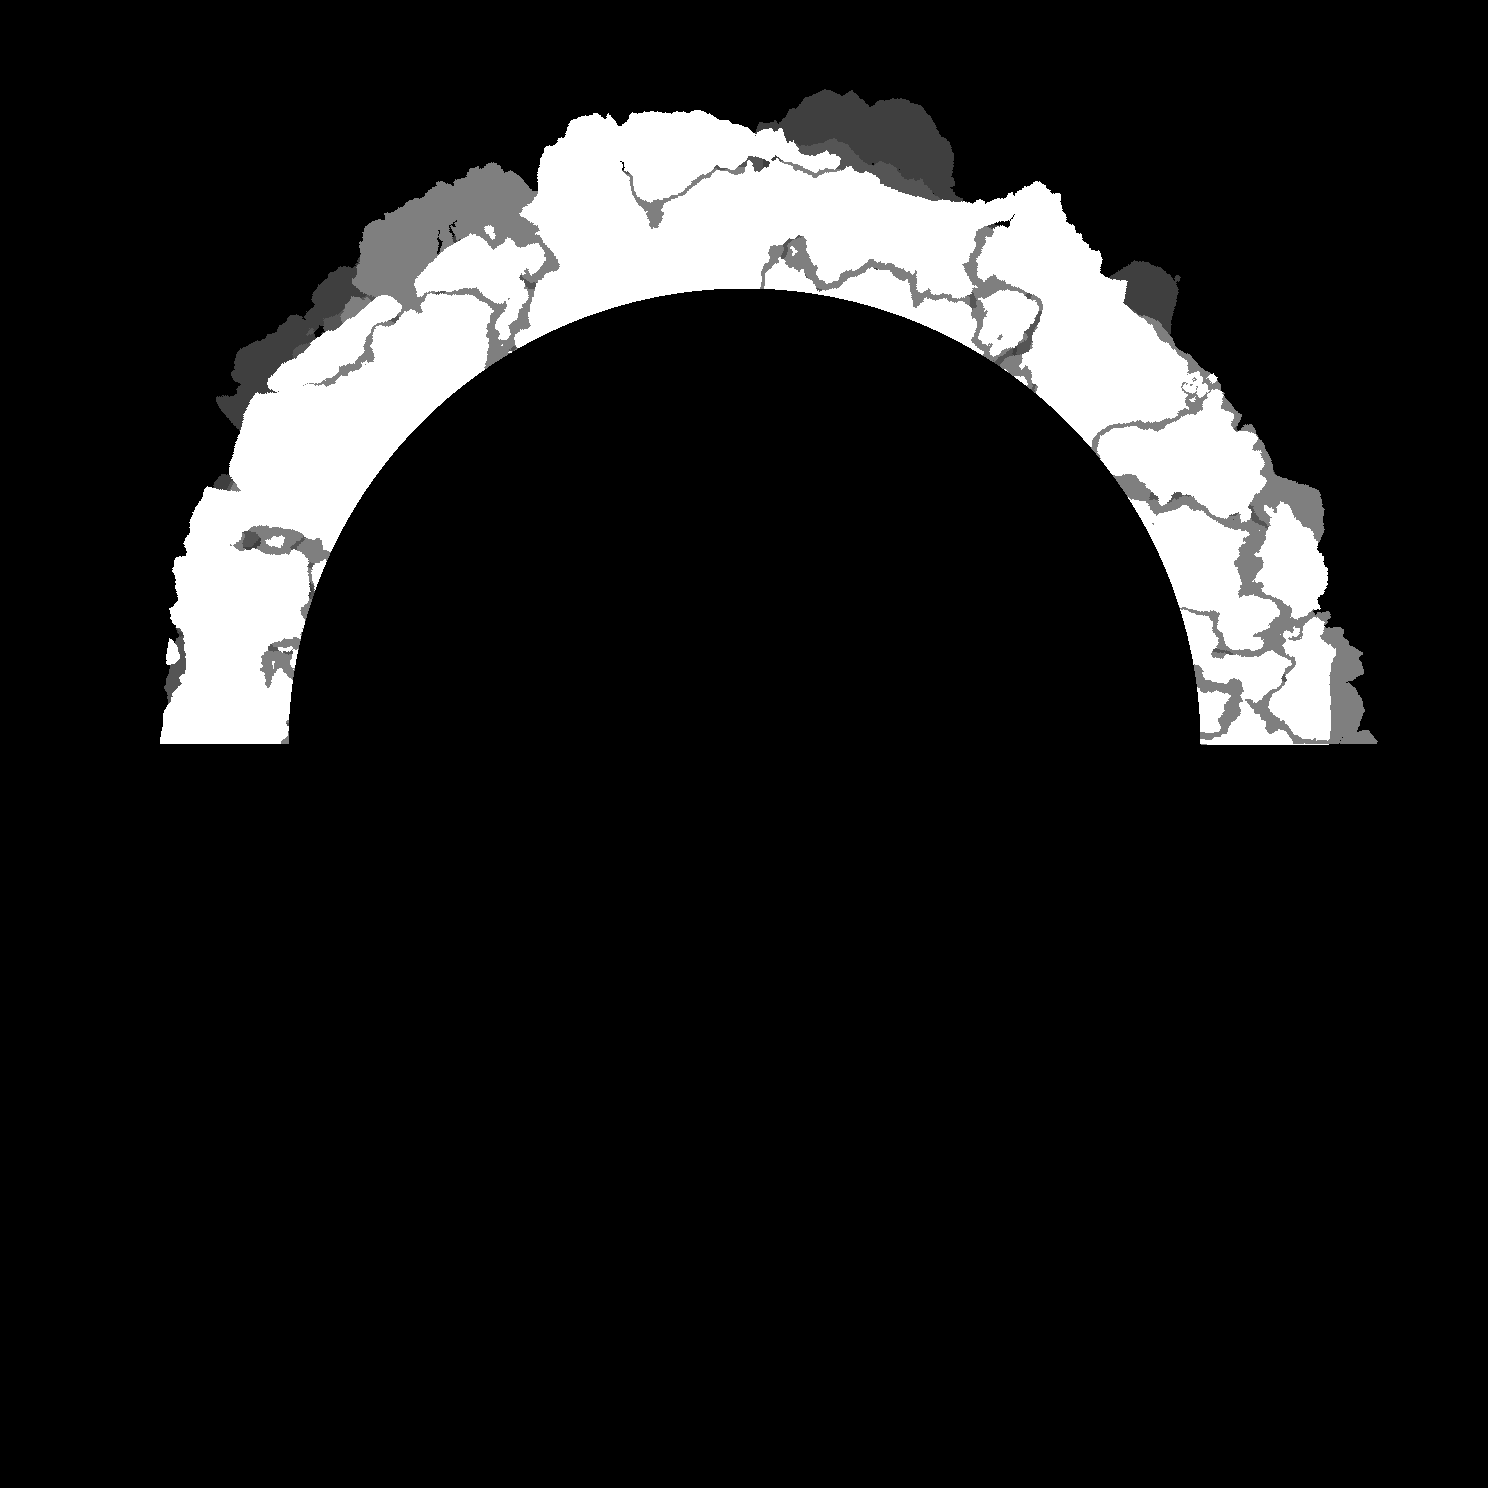
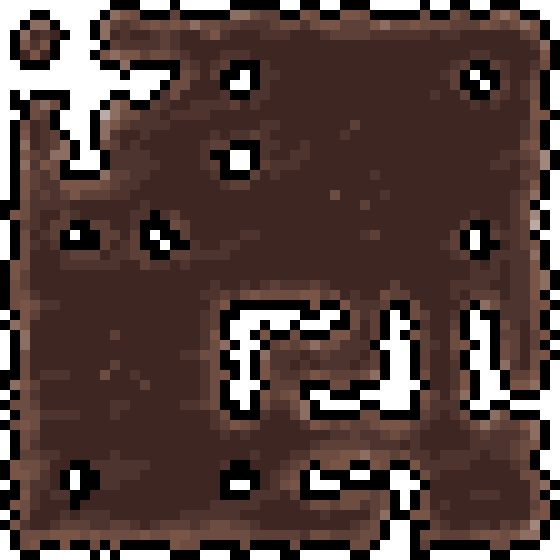
The end result is something like this when called with an angle of 180 degrees:

While the actual code for it looks like this:
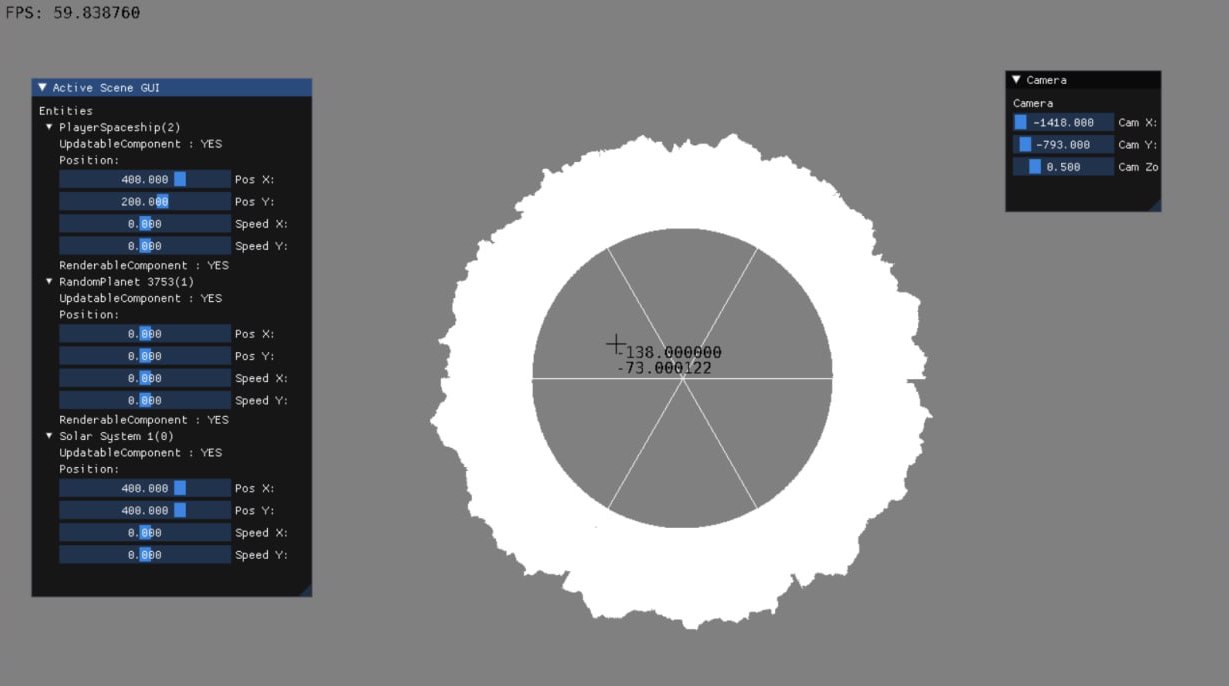
And lastly, when all is pieced together in game this part lets me render full planets (with multiple rotated sliced) like this one:
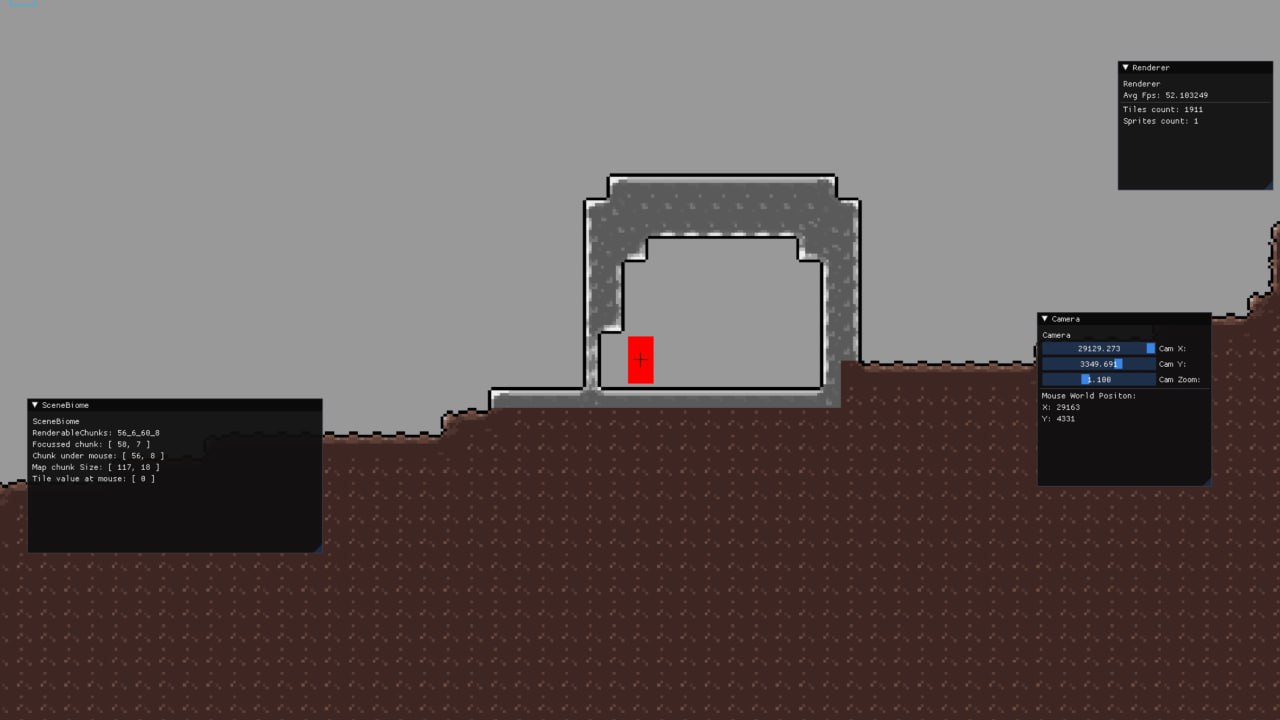
OpenGL Instancing and TextureMapping Tiles
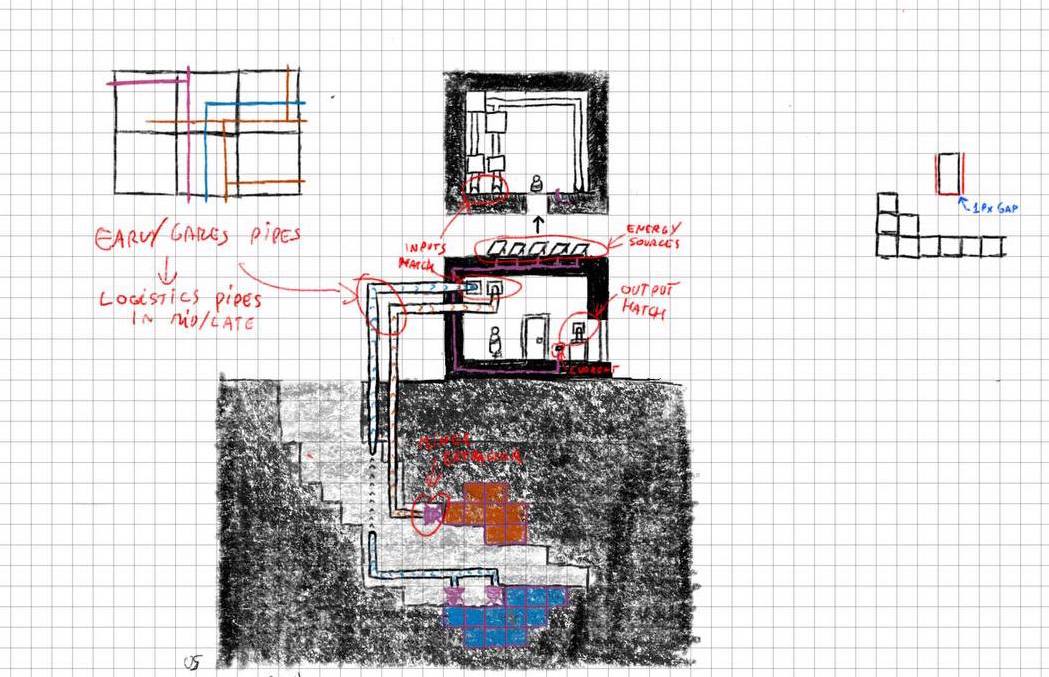
Now that I had a world generation, I needed tiles on screen. This was both a technical and graphical challenge. Technical because rendering tens/hundreds of thousands of small images on screen is not really straightforward to do if you approach it naively. So I needed to learn the proper way to do it, and it is with Instancing. This meant that I needed to rewrite part of the logic I had in order properly feed the data through each instance with the correct information. This was quite a bit of a mess to understand at first, but then once it clicked it wasn't too bad.
The other, more graphic, issue was in "what's the correct data to feed to the instance?". Because, each tile should display a different image based on their neighbor tiles. So I had to learn about tile mapping too and make my own small little utility to handle this task decently. This part was interesting, and also as a bonus I had to draw some stuff so it was a bit refreshing from all the pure coding I have done previously. Basically, the core logic for it is to follow a guide image divided in multiple chunks that covers all the neighbor combinations possible, so you have a nice "preview" of what you are doing and you can easily get a feel of the final output of the tile, aspect that if often tricky to achieve when working with different guides.
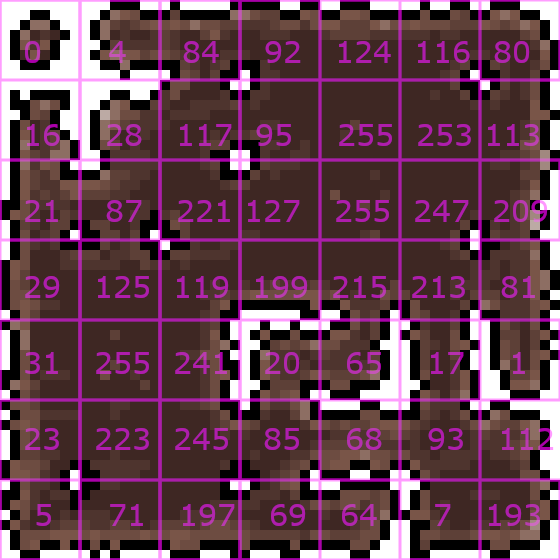
To efficiently link each tile configuration to the correct portion of the image, a bitmask is used to get a number from 0 to 255. Since each tile has 8 neighbor location, and each location can be occupied (1) or empty (0), you can easily create a unique bitmask that represent a unique configuration. That bitmask is indeed in range 0-255, so we just need a simple hashmap that convert that bitmask to a xy offset on the spritesheet and we are done with that too!
Conclusions
Since it was going so well, why did I stop you could ask? Well, as for most of the projects, I approach them for the pure joy of learning. I learned a lot from it, and I could learn much more, I know, but simply I started to get inspired by some other stuff and I wanted to dig deeper on that for the moment. But, as for each other project, is not completely dead. It's just frozen in time, and maybe, in the future, it could be defrosted.